GUNDARLIN

 1. Ferry – This is the pier from which ships leave to go to Tuern Or Neverwinter.
Note: If the party has not yet captured the statuette of the West on the Purple Rocks, do not embark on this voyage until they have thoroughly rested rememorized all spells and saved the game. Once they leave this dock their ship is attacked by a kraken (a giant, highly intelligent squid) and the party is washed ashore on the Purple Rocks.
Ships leave here every morning at 10 :00. The party must arrive between 9:00 and 10:00 to catch the ship-it always leaves on time . They can travel to Tuern or Neverwinter, but only arrive safely if they already have the statuette of the West. If Jagaerda is with the party and they have the statuette, she tells everyone goodbye here and does not go on the ship.
The seaman wants to charge 300 gold pieces for the trip . Pretend to leave in disgust and he cuts the price in half.
If the party retreats from the Purple Rocks without the statuette of the West, they can return here to Gundarlun and set sail again. The ship is again attacked by the kraken and they’re returned to the Purple Rocks.
2. Sea Kraken – The party sees the kraken for a moment from this high ridge, but doesn’t know what it is.
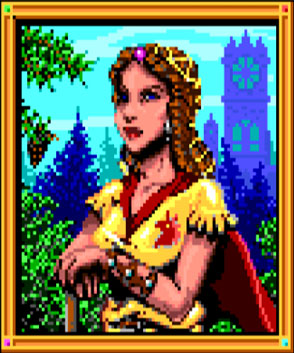
3. Secret Room (Princess Quest) – This is the secret room of the palace where the kidnapped princess has been held. As the party enters this room Jagaerda has just finished dispatching the last of her would-be kidnappers . They explain their mission, and she takes the party back to her father’s palace . He rewards them with a shield +1 and tell them much about the Purple Rocks. He thinks they might find someone in Tuern to take them there.
4. The Green Turtle Inn -.The party can rest here and recover hit points and spells.
5. The palace of King Redaxe (Princess Quest) – The party overhears him shouting that he doesn’t know what to do to rescue his kidnapped daughter.
6. A ship supply depot – Nothing to see here..
7. Residence – The resident of this cottage sees the party and immediately goes to pieces, confessing he was blackmailed into helping the kidnappers of Jagaerda.
8. The Sharper Lineage Arms Store.- Purchase weapons and armor here.
9. Warehouse – This gate leads to an area of warehouses, and is bolted shut.
10. Tana’s Merchandise Shop – .
11. The Company of the Brazen Pennant – The ships leave each morning from the end of the dock just south of here.
12. Hall of Training – Level up members of your party here.
13. Temple of Selune – Healing services are available here.
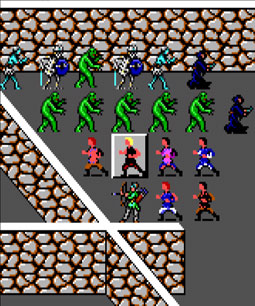
14. Encounter – The stone images on this cliff face come to life . They are margoyles, and attack the party.
15. Encounter – A small group of margoyles are hiding in this maze, and maybe at any of the indicated locations.
16. Encounter – Scraps inhabit this canyon.
17. Encounter – Pirates and a northman warrior are playing cards in this room.
18. Encounter – Asmall group of scrags is standing here, arguing about something. After the party defeats them, a single smaller scrap is left . If they let it go, the scrap points to the south wall . When the party listens there, voices are heard. This leads the party to the pirates whohave kidnapped Jagaerda.
19. Encounter – Pirates and otyughs guard this passageway.
 Synopsis: Gundbarg, the capital of CGundarlun, is the largest city on any island in this part of the Trackless Sea. Although it is a city of northmen, it is a member of the Lords’ Alliance.
When the party arrives it learns that Princess Jagaerda, the daughter of King Olger Redaxe, has been kidnapped by pirates and is being held for ransom somewhere in the town. The King fears that the kidnappers are waiting only for a moonless night to carry her off to a fate worse than death, and promises a rich reward for her rescue.
Gundarlun is an especially important stopping point because it is the location for the only temple and Hall of Training in the islands. Be sure to rest well here, heal all injured party members, buy all needed equipment, advance all eligible characters, rememorize spells and save the game while in this relatively safe haven.
If one or more party members are close to advancing a level, fight some battles here and use the Hall of Training to gain the extra benefits of their experience before moving on.
The party does not have to accomplish any missions on Gundarlun to complete the game, and can leave here whenever they wish.
Resting: The party may encamp anywhere except in the city streets.
Wandering Monsters: On the path on the western edge of the map 2 small groups of scrags may attack the party. In the city streets 3 groups of pirates may be encountered.
 Objective: Locate Broadhand at his shop (Event 14) during the Festival of Mielikki.
Experience: Hopefully you took advantage of the experience from Nesme, as Silverymoon is not as abundant. Most of the encounters should still be pretty straightforward. The rescue of Erek, Amanitas’ assistant, will require a battle with two trolls. If you took care of the trolls in Nesme, and leveled up, this battle should be easy.
Festival: As you walk around the city, there will be various banners that will tell you when the Festival is. If you miss the day of the Festival for some reason, the week long timer will start over.
Quests: There are still no side quests, which may seem odd for many gamers, including me. There is still only the main quest. Clearing out all the areas of monsters seems to be the only side quests in the game. After rescuing Erek, you cannot return to Nesme without him leaving the party, as he is only interesting in proceeding to Everlund and recusing Amanitas.
Magical Supplies: Miresk’s School of Thaumaturgy and Shop of Magical Items sells Clerical Scrolls and Potions (Invisibility, Speed and Healing). You can also purchase Guantlets of Dexterity as well as +1 Arrows and +1 Daggers. If you’ve been racking up the gold, you should have enough for a few Healing Potions which can be very useful during a tough fight.
Leaving: Rent a boat and head to Everlund after rescuing Erek. Allow him to join the party and equip him with Bow and Arrows like Krevish to help in combat.
Description
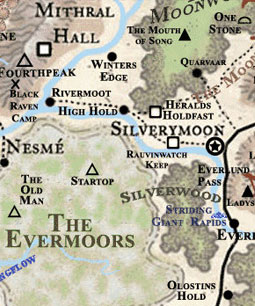
Silverymoon was often dubbed “the Gem of the North”, for it resembled and emulated the (formerly) lost elven city of Myth Drannor in many respects. It was one of the few civilized places in the middle of the rough and untamed wilderness that was the North of Faerûn. It had a rich cultural life and was renowned as a meeting place for all races that were morally inclined towards good. Even the occasional drow with good intentions (most notably the famous ranger Drizzt Do’Urden) could eventually find hospitality in the city of Silverymoon.
Silverymoon was also famous for its pervading tradition of magic, and was home to many notable wizards, sorcerers and other mages. One of its permanent structures, the Moonbridge, was created by magic.
Defenses
The fighting force that protected Silverymoon was comprised of the famed Knights in Silver. In 1372 DR, they were led by a paladin named Sernius Alathar. There were also the Spellguard, an order of, primarily, wizards and sorcerers led by the half-elven wizard Jorus Azuremantle. The High Marshal of the Argent Legion, the army of the Confederation of the Silver Marches (composed of soldiers from every signatory of the confederation) also resided in Silverymoon. The current High Marshal is a half-elf fighter/wizard by the name of Methrammar Aerasumé.
1 – Helmer’s Wall Tavern
|
2 – Hall of Training
|
3 – The Temple of Mielikki
|
||
4 – Vault of Sages
|
5 – Miresk’s School
|
6 – The Lady’s College
|
||
7 – Bridge Guards
|
8 – Broadhand
|
9 – Erek
|
||
10 – Troll
|
11 – Bandits
|
12 – Orcs
|
||