KRAKEN HEADQUARTERS


 1. Landing – This is where the party arrives on the island and hides their boat. Any time they return here they are offered the chance to take out the boat and escape, with or without the statuette. If they take the boat and leave the sea current carries them to Neverwinter.
After the party gains the statuette and before they depart the island they should be fully healed and have rememorized their spells . A tough ambush is waiting for the party in Neverwinter.
2. Throne Room – This is the throne room of the scraps’ castle.
3. Lookout – From the top of this ridge the party can see Vaalgamon’s ship round the point on its way to the Kraken harbor below. The general himself stands at the railing, directing their approach.
4. Alarm Trigger – Reaching this point on the main causeway sounds the alarm. Kraken guards attack the party immediately.
5. Encounter – Kraken guards are playing a game here. The party may attack them or flee. If they attack it is a somewhat easy battle, but if they flee the alarm is sounded and they have to fight more guards.
6. Encounter – A squad of Kraken guards has fallen asleep while standing watch in this tiny guard post, and one wakes up as the party enters . The party may attack him or flee . If they attack it is an easy battle, but if they flee the alarm is sounded and they have to fight more Kraken guards.
7. Possible Encounter – There is a 50% chance that agroup of margoyles are hidden here, and a 50% chance that they are one room farther west.
8. Encounter – A small group of otyughs guard this room. Defeating them in battle allows the party to search their trash heap and find amap that shows the area around the pier.
9. Possible Encounter – There is a 50% chance that Kraken guards are in this room, and a 50% chance that they are one room farther west.
10. Encounter – Kraken guardsman this outpost.
11. Encounter – Several scrags are eating something here. One of them is the leader of the local clan and has a shield +1.
12. Encounter – A pair of scrags are arguing here.
13. Encounter – A group of otyughs attack the party here.
14. Statuette (Quest) – This is where the Pearl Chest is 0-10 minutes after the party has landed on the island. The chest has a large contingent of Kraken guards.
15. Statuette (Quest) – This is where the Pearl Chest is 10-20 minutes after the party has landed. The chest has a large force of Kraken guards. This is one of the best places to attack them, but getting here in time without setting off the alarm is difficult.
16. Statuette (Quest) – This is where the Pearl Chest is 20-30 minutes after the party has landed. The chest has a large force of Kraken guards. This is an ideal place for the party to launch its attack.
17. Pier – This is the pier area where Vaalgamon’s ship is docked. The Pearl Chest is here 30 or more minutes after the party has landed on the island if the alarm has not been sounded. In addition to their own Kraken guards, the chest is defended by a margoyle.
18. Statuette (Quest) – This room is where the Pearl Chest is 10-20 minutes after the alarm is sounded. In addition to the Kraken guards, it is defended by an otyugh.
19. Statuette (Quest) – This room is where the Pearl Chest is 20-30 minutes after the alarm is sounded. In addition to the Kraken guards, it is defended by a small group of otyughs.
20. Statuette (Quest) – This room is where the Pearl Chest Guard is 30 or more minutes after the alarm is sounded. In addition to the Kraken guards, it is defended by several otyughs.
 Synopsis: Synopsis : The party’s boat lands on a secluded beach of this massive and heavily fortified complex. It is the location of the statuette of the West.
The statuette of the West lies in a chest carved from a giant pearl, and is stored in a vault that would be impossible to breach even with a party 10,000 strong . But, while it is being tranrred to Vaalgamon’s ship, it is open to attack.
Alarms and The Czuardians of the Pearl Chest: The Pearl Chest, with the statuette of the West, moves through the main Kraken complex and then out through corridors to the pier area . This process takes 30 game minutes from the time the party arrives on the island; for the first 20 minutes of the journey the chest has no extra guards.
If the party doused the lighthouse on Utheraal to delay Vaalgamon’s ship the process takes 40 minutes, with 30 minutes of time passing before extra guards are added.
The party’s objective is to intercept the guards as quickly as possible and seize the statuette without having sounded the alarm. Once the alarm sounds the battle to gain the magical treasure becomes much more difficult.
If they reach the pier and the alarm has not been sounded, the Pearl Chest stays there indefinitely due to problems on the
ship. This means the party never reaches the pier too late to save the statuette.
The alarm is sounded if:
a. A Kraken guard successfully flees from battle and escapes.
b. The party flees from any combat with Kraken guards.
c. The party steps onto the main causeway leading to the front door of the complex.
After the alarm is sounded the Pearl Chest is gradually moved deeper and deeper into the complex for defense, as shown on
the map. The farther into the complex it is moved for protection, the more monsters come to join the guards . It eventually ends up in the southwest corner of the castle, and stays there until the party successfully retrieves it.
If the party leaves the island without the statuette and returns, the alarm is turned off and the process begins again.
Strategy : The party’s objective is to reach the dock area as quickly as possible without sounding the alarm . Once the boat lands, note the time so the party can predict the location of the pearl chest. Be sure to add 10 minutes to the listed times if the Utheraal lighthouse was doused. Then head directly south to the southern coastal fortress . The party must pass through this fortress in order to reach the pier where Vaalgamon’s ship is moored.
Be sure the party is prepared for the combats in the southern fortress (#9 and #7), since fleeing from a fortress battle automatically sounds the alarm. No Kraken guards may be allowed to escape for the same reason. Don’t take the time to fight any extra battles, such as with the otyughs in the outer room of the fortress, or with the guards in the other outposts.
Go to the room with encounter 16. Use the LOOK command to make time pass if the party gets to the room more than ten minutes early. Then move around the room until the guardians of the pearl chest enter.
If the party arrives late, use the guidelines below to locate the chest and plan on facing extra enemies in the battle.
Resting: The only places the party can rest safely are a) in any of the Fortress Outposts after they have been cleared of
Krakens, and b) in the scraps’ castle after it has been cleared.
Wandering Monsters: Parties of Kraken guards patrol the direct access routes to the front gates of the stronghold (the area west of encounter 4.) There is no limit to the number of battles with these patrols, and approaching the complex this way sets off the alarm.
Troops of margoyles and I<raken guards patrol the stronghold itself (starting at encounter 4.) These forces are very strong and encounters with them are numerous. There is no limit to the number of battles with these patrols.
Small groups of scraps guard the northwest coastline. After the scraps’ leader is killed there is one more scrap battle and then their portion of the island is safe for the party to travel and rest . Ignore these areas until after the statuette of the West has been secured.
 Objective: Capture the Statuette before it gets loaded onto Vaalgamon’s ship.
Experience: Once the party reaches the statuette, the alarm is sounded. Even after the quest is completed, the large Kraken army in Event 14 spawns perpetually, allowing the party to rack up the experience.
When in close combat, use Hold Person and Stinking Cloud. In more open combat, use Fireball and Lightning Bolts. The Wand of Ice Storm, if found in Luskan, is useful here.
Quests: This is a timer quest. When you land on the island, the timer begins. If you doused the Lighthouse light in Purple Rocks, then you have an extra 10 minutes. If you trigger the alarm, then the chest containing the statuette moves further within the fortress where additional monsters join the fray. If the party leaves the island without the statuette and returns, the timer is reset again.
Despite Krevish’s warning (if he is still with the party), head directly down the middle of the map to Event 14, and if you don’t intercept the statuette there, move to 15, then 16. On the way to the statuette, you will have many encounters, try to flee if you can. Once the statuette is secure, then attack away.
Leaving: When taking the boat of the island, the current will take the party pack to Neverwinter. If the party has the statuette with them, there is a significant ambush upon arriving at Neverwinter. After leveling up in Neverwinter, head to Loudwater by foot. It is South East of Neverwinter and Yartar.
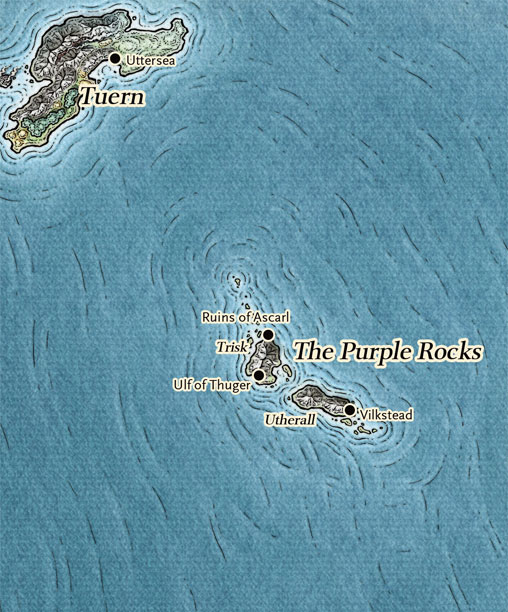 Here, like in rural communities all over the North and other outer islands like Tuern, magic use was punishable by death. People of the Purple Rocks appeared to worship Tempus (called Tempos), Auril and Umberlee, the usual Northman deities, but their idols of those gods all showed many tentacle-like arms.
By the time of the War of the Silver Marches in the late Fifteenth century DR, the people of Utheraal and Trisk were under the sway of the kraken Slarkrethel. The islanders wore tattoos of krakens made with squid ink and built longships that boasted kraken-shaped figureheads. They greeted visitors with food and shelter, but didn’t speak of Slarkrethel or the absence of children from their communities. Visitors who tried to investigate the mysteries of the Purple Rocks were asked to leave. Those who refused to do so were captured and sacrificed to the sea.
The islanders showed their devotion, among other ways, by tossing their newborn children into the sea to be claimed by Slarkrethel. The experience transformed the children into fanatics dedicated to the Kraken. They returned from the sea as humans, but when they reached old age, they transformed into sea spawn and rejoined their master in the dark depths. Some children returned having suffered partial transformations, leaving them semi-bestial until their full transformation when they reached old age. These wretches were hidden until their final change, to keep the secret of the Purple Rocks. Kraken priests were the tenders of the kraken’s flock. Most of the priests were island natives, but some were merfolk, merrow, or sea elves that lived in the water around the Purple Rocks.
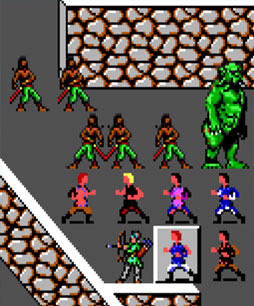
1 – Kraken Guard
|
2 – Scrags
|
3 – Pirate
|