Gateway to the Savage Frontier – Story
SECTIONS
Welcome to the “Getting Started” guide to Gateway to the Savage Frontier. This guide will give you a quick overview of how this site is organized so you can find your way around more easily.
The Story section contains information on the game’s plot and back story. It also has Combat strategies and hints on wilderness travel.
The Map section is where you’ll probably spend the most time during the game. Not only does it contain maps for each of the locations, but also Event information, a Synopsis and Walkthrough for that specific location. Each of those tabs contain hints and spoilers for the game if needed.
The Monster and Items sections contains a list of those respective encounters and items found in the game.
The Misc section has information on Levels, Ability Scores, equipment and more.
STARTING PARTY
You can have 6 characters in your party, and we recommend filling up all those slots and maxing (M”odify) their stats before starting. There is plenty of experience points in the game to reach your level cap, so we recommend multi-classing the characters to maximize melee and ranged offensive power especially in the mid and end game. Humans are not able to multi-class and only humans and half-elves can be Paladins and Rangers. Elves get a +1 bonus when using Long Swords and Bows. We recommend having at least 2 Clerics in the party for healing and Turning Undead as well as 2 Rangers for their bonus against Giant-sized monsters. Our party has 4 Magic-Users which will get very powerful towards the end of the game (Fireballs and Lightning Bolts)
3 Male Elf – Fighters/Magic-Users (Lawful Good)
2 Male Half-Elf – Cleric/Ranger (Lawful Good)
1 Male Elf – Fighter/Magic-User/Thief (Lawful Good)
You are able to transfer human and non-human characters to Treasures of the Savage Frontier, thus our recommended party will transfer successfully. Some items in Gateway to the Savage Frontier will not transfer like the magical Elven Longsword and some scrolls and any items higher than +3. Rare Items like the +1 Armor of the Glacier, +3 Sword of Stonecutting and the +1 sword of Icewind Dale will transfer. The DOSBox version of Treasures of the Savage Frontier has a Gateway to the Savage Frontier SAVE folder within it. Just copy your files over from the Gateway to the Savage Frontier SAVE folder when you are ready to play the sequel.
MAPS
All the mazes in this game are 16 by 16 mazes with each coordinate numbered from 0 to 15. The upper left corner is (0,0) and the lower right corner is (15,15). The first number of any coordinate is the horizontal direction and the second number is the vertical direction. Use the Area command to map out the maze as you progress through it. The Area command is useful for locating hidden rooms. If you see an outline of a room but cannot find a door, there might be a hidden door somewhere, although some hidden rooms shown in the Area command are solid areas and are not rooms. Also note the doorways you see in combat. Hidden doors show up in combat.
HEALING & SPELLS
Finding a place to Rest is very important. There are very few mazes in the game that have no rest areas. In most cases you can rest in a room where you fought a battle. If you cannot rest, move to another place. Some common sense helps. Resting in a public street is usually forbidden. Resting in a hidden room usually works. The Fix command will heal and re-memorize spells; however, the Fix command will not memorize additional spells. When your clerics and mages gain a new level, they also gain additional spells. To get these spells you have to do an explicit Memorize command. Once they learn the new spells, the Fix command will re-memorize them. If you decide to change your spell selection you must use the Memorize command instead of the Fix command.
 INTRODUCTION
GATEWAY TO THE SAVAGE FRONTIER is the first in a new series of ADVANCED DUNGEONS & DRAGONS® computer role-playing games set in the Savage Frontier, a broad area on the northwest seacoast of the FORGOTTEN REALMS`” game world. In GATEWAY, the characters have the chance to save the Savage Frontier from a surprise Zhentarim invasion through the Cjreat Desert.
WHERE TO GET HELP
The various sections of the clue book provide different kinds of adventuring help. The BACKGROUND section describes the events that have lead up to the adventure . The EVENTS section describes one way the adventure can turn out The MAPS section shows the different locations in the game and describes the various encounters there.
The MONSTERS section contains a description of all monsters in the game with information on what the monsters can do and how to most effectively fight them. The NPCS section describes the various non-player characters who can join the party. The MAGIC ITEMS section lists the magic items in the game and where they are to be found . The CITY DIRECTORY lists the various services that are available in the cities of the Savage Frontier.
THE ORDER OF EVENTS
The EVENTS and the MAPS sections present the various challenges in the order of increasing difficulty. The tasks the party must complete to win can be accomplished in almost any order. Feel free to set out across the wilderness in any direction in search of adventure . If the party is strong enough to overcome the enemies they meet, their successes will help them win the game-even if their effect on the big picture isn’t instantly apparent
 THE BACKGROUND
Two thousand years ago Ascore was a thriving port on the Narrow Sea. The gateway to the great dwarven nation of Delzoun, it was a melting pot where humans, dwarves and elves all conducted trade with nations across the Forgotten Realms.
Now Ascore is nothing but a maze of sand-swept ruins, its mighty stone docks thrust proudly into the advancing wastes. The Narrow Sea has vanished before the relentless march of the Great Desert. As the waters receded from Ascore and the city began to strangle, the leaders of the metropolis faced new dangers. Orcs, trolls, dragons and especially the monsters of the growing desert all came to feast on the city’s bones as it shrivelled in the suddenly-relentless sun.
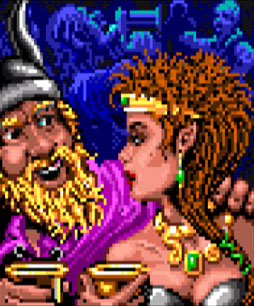
/\score called upon the greatest magicusers of the Realms, promising wonderful treasures if they could create a magical defense to protect the city. Although many tried and failed, no wizard could claim the prizes. Then, one blistering summer day, four old and powerful magicians from the distant east appeared at the city gates. Each, using his special knowledge and rare components, had crafted a magical statuette on a triangular base to protect the city from monsters from the north, east, south and west .
Each statuette glowed magically with a symbol representing the part of the Realms upon which it was to focus, and they were breathtaking to behold. Each created a small area where any monster become lethargic, even nauseou . The creatures upon whom it was tested hurried away from the city. When the four statuettes were set together upon an altar in the great plaza of Ascore, however, their power increased many thousandfold .
The great stone pyramids that surrounded the altar began to glow, as the energy of the magical device was magnified in all directions. The wizards’ creations worked . The monsters that had plagued the once-great seaport fell back, and the city was reprieved. But it was not enough to save Ascore. The Narrow Sea continued to recede, the merchants abandoned their shops or changed their trade routes.
The great dwarven navy lay aground in the dusty harbor, and the city melted away in the tide of the encroaching desert. During the city’s final death throes corrupt city leaders took the statuettes for their own enrichment. The set was split apart, and its four glowing elements passed through many hands in the Northern Realms. For many years the Zhentarim knew of the existence of the four statuettes, and of their potential power. With the help of the evil Kraken Society, who themselves held one statuette in the Purple Rocks, the Zhentarim located the remaining three items .
One each was held by Ceptienne, a sorceress in the Star Mounts; by the Hosttower Mages in Luskan; and by dwarves in Uorkh. To gain the statuette from the honest dwarves in Uorkh the Zhentarim simply murdered their leaders, took over the town and stole the magical treasure. Deals were struck with the other, evil owners to trade the statuettes for control of their local regions after the Zhentarim conquest.
The long-held Zhentarim goal to breach the desert and dominate the Realms from the Moonsea to the Sword Coast was now at hand. All that remained was to reunite the statuettes at Ascore and focus them to the east to clear the uncrossable desert. A Zhentarim general named Vaalgamon was dispatched to oversee this task . A ship would carry one statue from the Purple Rocks to Luskan, where a convoy would bring it and the Hosttower s object overland to Ascore.
Ceptienne would fly to Ascore with her statuette atop her black dragon steed . A column sent from Zhentil Keep itself would go around the desert on the long, traditional path and escort the final statuette from Llorkh. The party, quite by accident, stumbles across this plot in its final stages . They realize that they are the only ones in the Savage Frontier who can stop Vaalgamon from collecting the statuettes and completing the Zhentarim conquest of the region.
 THE EVENTS
After purchasing new equipment and preparing their spells, the party saves a small man named Krevish from being assaulted by a group of bandits . Krevish leads the party to his Captain, who offers the party the job of ‘taking care of an evil cleric who is causing trouble in Nesme. Krevish offers to come along . After accepting the job, the party rents a boat and heads for Nesme.
In Nesme, the party searches the city for the cleric. They fight their way through the barbarians who are roaming the streets, and help clear the city’s ruins of trolls. Finally, they find the secret hidden temple of Bane and defeat the evil cleric . But, in the rubble after the battle, they learn that the evil Banite cleric was the center of a plan to stop the equally evil Zhentarim from invading the Savage Frontier. It is now up to the party to stop the invasion of the Zhentarim. Their only clue mentions one of the Banite cleric’s allies in the town of Silverymoon and a good southern wizard.
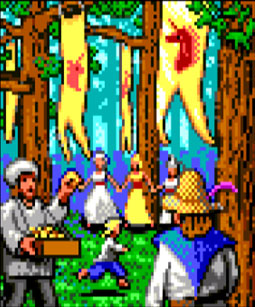
The party travels by boat to Silverymoon. During the festival to the goddess Mielikki, the party meets the Banite’s ally and learns that the southern mage is called Amanitas. Searching the town for the wizard, the party discovers that Amanitas has been kidnapped. During their search, the party rescues Erek, Amanitas’ servant and learns that the wizard has been taken to Everlund. Renting another boat, the party sets off to Everlund to rescue Amanitas.
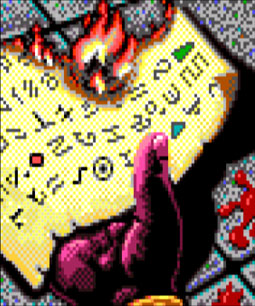
In Everlund the search leads through a secret door into the hidden dungeon where Amanitas is being held. After a sharp battle, the party releases the kidnapped mage. Amanitas tells the party what he knows of the Zhentarim Plan, and gives them the riddles that lead to the four statuettes . He also directs the party to look for a Kraken Outpost back in Yartar.
The party travels overland back to Yartar. Their stay is reasonably uneventful, but as they try to leave the city they are pulled through a secret door and down into a cell in the Kraken Complex beneath Yartar. The party escapes from the cell and defeats the Kraken Captain and his men. In the remains of the captain’s office the party finds information that leads them toward the coastal cities of the Trackless Sea. The party defeats several giant squids in a huge water tank as they escape from the underground complex.
The party travels west to Neverwinter, the nearest city on the coast of the Trackless Sea. In Neverwinter, they help clear the city’s indoor gardens and check out the items in the magic shop, before proceeding north to Port Llast. In Port Uast, the party searches the seemingly haunted ship, the Gallant Prince On the ship, they find clues that point to the Hosttower of the Arcane in the port city of Luskan.
In Luskan, the party finds that the pirate captains of the city are receiving their annual gifts from the local sea captains . After defeating many of the pirate captains’ sailors, the party finds the imposing Hosttower of the Arcane, ‘a great tower…’ with ‘many spires …’ In the dungeon under the tower, with the help of Brinshaar, the renegade Hosttower mage, the party finds the statuette of the East. But, as the party leaves the tower, Brinshaar turns on them and tries to get the statuette for himself. The party defeats this traitor and continues with
the quest.
Following the second of Amanitas’ riddles, the party sets off with the Company of the Brazen Pennant to the Island of Tuern. While exploring the island, the party defeats a group of fire giants and finds a piece of meteoric ore. The party then takes a ship to the island of CGundarlun . While exploring CGundarlun, the party finds and frees the kidnapped Princess Jagaerda . She joins the party while they search the remaining islands.
As the party leaves CGundarlun by ship, a giant Kaken smashes the ship to pieces. The party is washed ashore on the Purple Rocks, a small set of islands controlled by pirates and the Kraken Society. The party takes a small boat across the straights to the great Kraken Headquarters . They race through the headquarters to get to the statuette of the West before the Krakens put it aboard ship and set sail . The party arrives just in time, defeats the Krakens, and gains the statuette of the West.
When the party gets back onto their small boat, the currents take them to the city of Neverwinter. After taking some time to rest, train, and get the meteoric ore made into a magic sword, the party sets off overland for Amanitas’ home in Secomber. There, Amanitas directs the party through the city of Loudwater toward the dwarven city of Llorkh.
In Loudwater, the party spots a huge group of Zhentarim who are intent on ambushing the party. By using side streets, the party cuts down the group of Zhentarim and finally defeats it. As the party explores the rest of the town, they discover Rishpal, an ex-Zhentarim Guard . He joins the party for their journey to Uorkh.
In Llorkh, the party enters a shop to buy some additional supplies and is dropped down a secret chute into a huge arena. Rishpal shows himself to be a traitor and joins the Zhentarim leader Vaalgamon to watch the party fight for its life. After battling in the arena, the party escapes from captivity, frees a half-orc named Muthtur, and battles their way through the arena beneath Llorkh . Finally, they find the statuette of the North and exit back into the wilderness. Muthtur thanks the party and leaves them before they reenter a city.
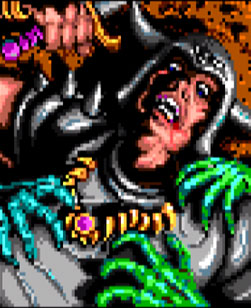
The party heads back to Secomber to speak to Amanitas again. He directs them to the Star Mounts, ‘where even the birds cannot fly.’ The party rents a boat and travels up the river into the dangerous High Forest. At the base of the Star Mounts the party saves a group of giant intelligent birdcreatures, the aarakocra. The aarakocra tell the party that they have seen a woman riding a dragon among the peaks. The aarakocra fly the party to her fortress . In the fortress, the party negotiates a maze and finally confronts the evil magic-user Ceptienne. They defeat her and gain the statuette of the South.
The party then travels overland through Sundabar to Ascore . In Sundabar, the Zhentarim leader Vaalgamon tries to stop the party with illusions, bribes, and hideous monsters. But the party makes it through to the dead city of Ascore.
In Ascore, the party fights past the undead remains of the city’s inhabitants, and finally confronts Vaalgamon in a seemingly endless combat maze. The party finally sprints past Vaalgamon and reunites the statuettes with the famous pyramids of Ascore . The power of the statuettes, the pyramids, and the Great Desert itself, combine to defeat the Zhentarim hordes . The party makes a harrowing escape and returns triumphantly to Yartar.
 COMBAT STRATEGIES
Consult the MONSTERS section carefully to study the different monsters in the game to learn their strengths and weaknesses. Do the same with the list of clerical and magic-user spells in the Adventurer’s Journal, to learn their functions. Look for spells that are especially effective against various kinds of monsters.
Pay extra attention to spells that can be cast in camp before a battle to strengthen the party.
Although this book at times suggests specific spells that will be useful in particular battles, many spells have broad uses in many situations. For example, casting Bless or Protection from Evil before a close battle may give the party just enough extra staying power to come out alive-this is good advice in any especially dangerous encounter.
To speed up the game at the end of any fight, hold down the “E” key on the keyboard after the last monster is defeated. Each character will flash through their “End” command and you’ll be offered the chance to end the battle.
Here’s a short list of strategies to try if the party is having any problems coming out as the winner in combat situations:
Is the party getting hurt by enemy archers or magic-users?
— Hide vulnerable party members (especially those with armor classes worse than 2) behind a comer to avoid spells as well as arrows and other missile weapons . They can then step out into view only when they’re ready to cast a spell.
— Charge the front row into hand-to-hand combat, since missile weapons can’t be used when an adjacent enemy threatens the character or monster.
— Try to hit enemy spell-casters with at least one spell, melee attack or missile every combat round-they cannot cast a spell on any combat round in which they were damaged. If they were preparing to throw a spell when they were hit they may lose it completely, which gives the party a big advantage.
Is the party almost winning many battles, but coming up just short?
— Use geography to create a momentary numerical advantage against a part of the enemy force – try to arrange the party so that few of the monsters can attack the party, but the party can attack them with as many characters as possible. In a fight against big monsters try to use a corridor’s protruding doorway to block the monster’s path. Executed properly, the monsters will have to attack one at a time, but four characters can hit the monster. The rest of the party can attack with spells and arrows from behind the front phalanx of fighters, creating a 6-1 or greater advantage.
— If the magic-users or clerics have memorized spells they can’t use (for example, a Sleep spell cannot be used against a monster with 6 or more hit dice), discard them with the CAST command in camp prior to the battle. Then use that slot to memorize another spell that will help during battle, such as Magic Missile or Charm Person.
— Always save the game before a big battle- it makes it much easier to get back into the game quickly and either rejoin the fight or work around it.
— If the party is defeated in a close battle, remember that small changes in strategy can have a great effect . A few small differences in preparation-and a little luck-are often the difference between a defeat and having all the characters standing when the last monster goes down.
— Always get every party member the best armor available Often high quality armor is left as treasure after a battle. Be on the look out for magical armor, it will not only give the character a good AC, but it can increase their mobility as well.
— Always keep the characters in the back row well stocked with arrows, and give magic-users plenty of darts to throw at the enemy once their spells have been exhausted. Know what each character’s most effective weapon is for any kind ofcombat by studying the Weapons Tables on page 40 of the Adventurer’s Journal.
— Concentrate attacks on as few enemies as possible . If a fight starts with six manticores, it’s much safer if halfway through the battle there are three healthy manticores left instead of six damaged ones. Six damaged manticores can hurt the party twice as much as the three healthy ones.
— Use two or more characters to attack an enemy from opposite sides at the same time to increase the character’s chance to hit. Once a character is next to a monster, he can often slide around behind it while another character continues to attack from the front.
— Practice using a thief to Back Stab enemies during combat-the extra damage can help take out especially dangerous opponents quickly. Sometimes luck plays a big part in these battle : a Stinking Cloud spell may take out three ogres during one battle, only to mildly impair only one ogre the next time around . A Hold Person spell make take out three pirates in one battle and none the next. If the party fights a battle once and seems to have bad luck, perhaps their fortune was worse than their strategy. A second try may win the day.
What are powerful spells for spell casters to throw?
— The first level clerical spells Bless and Protection from Evil are the most useful in combat.
— The second level clerical spell Hold Person is very useful against character type opponents. Remember to target it all three times.
— The third level clerical spell Prayer is very useful in combat.
— The first level magic-user spell Sleep is the most useful weapon against large numbers of low hit-dice monsters. The spell Magic Missile is useful against almost any monster. And the spell Charm Person is very useful against high level character type opponents.
— The second level magic-user spell Stinking Cloud is an effective weapon against anything that breathes. The spells Invisibility and Mirror Image are useful defensive spells for the mage.
— The third level magic-user spells Fireball and Lightning Bolt are the most potent offensive spells. The spells Blink, Haste, Invisibility 10′ Radius, Protection from Evil 10′ Radius, and Protection from Normal Missiles are all useful preparation spells.
And generally remember to:
Accept the offers of help from NPCs, unless the NPC section says to reject them. Krevish, Erek, )agaerda, and Muthtur can all help the party a great deal. Make sure to keep all NPCs supplied with arrows so that they won’t charge headlong at the enemy.
— If all else fails, an area the party can’t get through may be a little too tough for them. Try exploring someplace else until the party has enough experience to train for a higher level. Then come back and try again.
— Don’t hesitate to use different combat strategies than the ones listed in this book. This is a big game and there are lots of different always to achieve your goals. Clever players will always find new ways to solve old problems.
 WILDERNESS TRAVEL
When travelling from city to city in the wilderness, stick to the roads, paths and rivers whenever possible. Open plains are the next safest terrain to cross.
If the party enters the wilderness looking for adventure, the forests and rough hills will result in more frequent encounters with higher level monsters. These may even include especially dangerous monsters like hill giants. The moors are even more dangerous to traverse; enter them at your own risk.
Deep forests, canyons and the Great Desert are the most dangerous terrains of all. The only time the party should travel in deep forests or canyons is to reach the Star Mounts, and the party never needs to travel through the desert.
In the more dangerous areas the party may encounter poisonous monsters. One hit from these enemies can kill a character. If a character gets poisoned, go quickly to the nearest city with a temple and pay for them to cast a Neutralize Poison spell to bring the character back.