ASCORE

 1. Encounter – Up to 4 groups of Ascorean skeletons and Ascorean mummies attack the party at any of these locations.
2. Secret Door – These secret doors can only be found if the party has all four of the statuettes, is in search mode and has won the battle withb either the ettin or the Zhentarim mage.
3. Wizard of Oz (Quest) – The door to this room is locked and requires a Knock spell to enter. The creature inside has a big voice, but turns out to be a small, eccentric magic-user. Tell him the truth and he tells the party about how he is deciphering the mirror maps of Ascore for Vaalgamon. If the party then attacks him, his treasure includes Bracers of Defense AC 4.
After winning this battle the party can find the secret doors to the mirror maps room. If the party doesn’t attack and later returns, or if they lie to the magic-user, he attacks the party with the advantage of surprise.
4. Encounter – A small group of Ascorean mummies attack the party here. Search the room to find a chest. The chest is trapped. Have the party’s thief attempt to disarm the trap. Inside the chest are a clerical scroll with 2
Cure Light Wounds spells, a set of arrows +2 and a long bow +2.
5. Abandoned Buildings – This area is empty.
6. The remains of an ancient inn – This area is empty.
7. Reinforced Wall – The east wall shows Vaalgamon’s recent brickwork.
8. Ascorian History – A mural here depicts Ascore during the height of its glory.
9. An old boatbuilding shop – This area is empty.
10. Abandonded quarters – This room, like the ones around it, used to be a seaman’s quarters. The east wall looks new, with well-set solid stonework.
11. Magic Mouth – A magic mouth welcomes the party to central Ascore. It tells them that tapestries against each wall contain maps of various parts of the city.
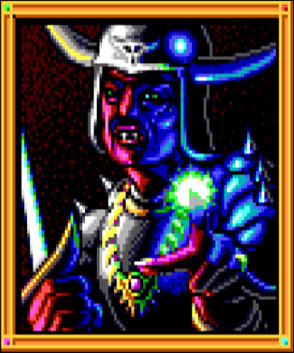
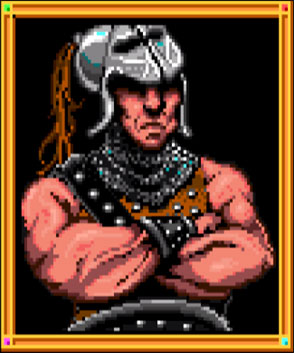
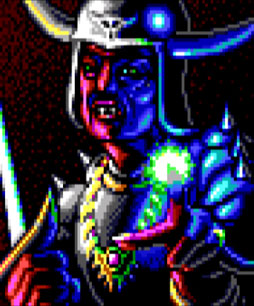
12. Vaalgamon (Quest) – Vaalgamon challenges and taunts the party here. This begins the extended combat sequence that culminates in the grand finale of the game.
Once the party enters combat, it moves from combat area to combat area until it exits into the plaza of Ascore, exits back out the way it came in, or all the characters die. Only one character need exit from a combat area for the whole party to exit. The party need not kill all of the monsters in an area to exit. In some cases having the fastest party member sprint for the exit is as useful a strategy as killing every monster in order to move on towards the goal.
Use the AIM command to search each combat region and figure out where to go before each battle is joined . This helps the party to decide if it’s better to fight or run in the particular location.
Examine the Final Combat map carefully. The easiest route through the final combats is to exit the first combat area to the east, exit the next three combat areas to the north, and exit the next area to the west
Once the party is in the upper left combat area the party does not have to confront Vaalgamon. They can take the passageway that exits to the north that goes around the room where Vaalgamon has gathered his forces. When one character exits the combat area to the north, the party has won the game!
13. Special Gate – Vaalgamon’s newly constructed gate lies to the east. It can be opened only if the party has all 4 statuettes. A group of giant spiders attack the party as they start to pass through the gate. After killing the spiders it is safe to rest here.
14. Encounter – Thick vines hang from the edges of the collapsed ceiling of this room. If the party tries to climb them or to search the room, a shambling mound attacks. After defeating the monster the party can climb the vines and return to the wilderness map.
15. Encounter – An ettin inhabits this room. After the party defeats him they can find the secret doors to the mirror maps room. The ettin has anote giving directions to where the doors are located. The ettin’s treasure includes a Dwarven Battle Axe +2 (+4 if used by a Dwarf), a potion of healing and gems.
16. Encounter – A fire burns at the center of this room. If the party puts it out, several Ascorean skeletons and Ascorean mummies appear and attack the party. The fire’s owners, a troll and a large group of hobgoblins, return and attack as well.
17. Mirrors (Quest) – Each of these three mirrors bears a faint impression of an ancient tapestry, that hung before it for centuries. The party copies each into the journal, but remember that mirrors show things in reverse, not the way they really look! These maps must be held up to a mirror to show the true layout of Ascore!
Each mirror is guarded by a group of Ascorean mummies and Ascorean skeletons. Be sure to rest and rememorize spells between each of these three battles-once the undead defending a particular mirror have been destroyed that spot is safe for resting. All other areas of the mirror room are also safe for resting at any time.
On their first move after their third victory, a party member falls into apit. In the pit, the character finds a clerical scroll with two Cure Disease spells and a magic Elven Long Sword, +2 vs . Undead.
18. Ancient Souvenir Shops – Ascorean skeletons attack the party the first time they go here.
 Synopsis: This is the scene of the grand finale of the game. Ascore covers a much bigger area than any of the other regions of the game. The party should come here only after it has acquired all four of the ancient statuettes.
The once-great city has been taken over by legions of undead, the tortured souls who were its last defenders . Vaalgamon’s forces have cleared a portion ofthe city and built a hastily-erected wall in an attempt to keep the undead away.
The party must get past the wandering undead find a way through the Zhentarim wall, then make its way through the ancient city to the plaza where the statuettes and the Ring of Reversal can be combined to destroy the Zhentarim plan.
Note: Once the party passes through Vaalgamon’s gate they enter a series of extended combats with no opportunity to stop and rest or rememorize spells. Do not pass the gate until the party has completely prepared for the fights that lie ahead. They can return through the gate if these battles prove too difficult.
Rest: The party may rest only in the areas west of Vaalgamon’s gate after the wandering monsters there have been cleared. The area near the mirror maps is safe for resting at all times. They may also rest in the area immediately east of the gate.
Wandering Monsters: Eight groups of Ascorean skeletons inhabit the area outside of Vaalgamon’s stronghold. Eight groups of Ascorean mummies lurk near Vaalgamon’s Gate, acting as guards to prevent his men from coming out. Encounters with these mummies occur if the party passes back and forth near the gate.
Commodore 64 Owners: Some of the monsters and walls in the final combat may be different from those listed due to technical constraints. However, the same strategies should apply.
 Objective: Locate Vaalgomon at location 12 to start the Final Combat.
Experience: You should already be maxed out on experience and levels at this point.
Quests: The party should have all four Statuettes and the Ring of Reversal before proceeding to the Final Battle.
Leaving: Head to location 12 to start the Final Battle with Vaalgomon’s army. Make sure you have rested and memorized all spells.
 The two-year-long War of the Returned Regent freed the Vale from Rensha rule. Finally, in the Year of the Wandering Wyrm, 1317 DR, Nanathlor Greysword defeated Pasuuk and the Renshas’ forces at the battle of Tanglefork and became the ruler of Loudwater. However, some histories marked his reign as commencing four years earlier, circa 1313 DR. In either case, the start of Nanathlor’s reign marked the official founding of Loudwater.
In Tarsakh of the Year of Shadows, 1358 DR, on a number of separate occasions, the residents of farm holdings on the outer edges of Loudwater’s domain heard eerie howling and later discovered corpses near their lands. These were identified as various wicked beings, including two drow and some fish-like humanoid, and all carried bite marks. Nanathlor was notified and he formally reported the news. A search of caves in the Delimbiyr valley showed sign of recent occupation, but no connection to underground. Later that year, in Eleasias, a mysterious healer of the High Wood called Radoc helped victims of an orc raid and escorted them to Loudwater. His odd appearance, taciturn nature, and purchase of supplies with crystals made him the subject of rumor before he departed.
Nanathlor ruled in relative peace for 52 years until Malarite lycanthropes attacked the city after a blood-red moon appeared in the sky over the Vale. Nanathlor himself was on his deathbed but the citizenry, led by a young man named Stedd Rein saved the town when Stedd opened his father’s stock of silvered weapons.[citation needed] Kalahar Twohands, Gauntlet of the western marches, replaced Nanathlor, who didn’t survive to see his city saved. Kalahar oversaw the most turbulent years in Loudwater’s history since the war, including a mass migration of orcs, threats from a bandit army and their illithid allies, dragons and several attacks from the Zhentarim.
Along with Secomber, Loudwater was the only settlement of any size in the area to survive the effects of the Spellplague, though it was much reduced in size and had been almost completely abandoned by the elves. Still, it managed to resist the dangers of the surrounding area. What it struggled to cope with was internal troubles. There was barely enough trade to keep the town afloat and dangerous criminals replaced the small-time thieves guild that had been operating there. Many foundlings discovered on the shores of Highstar Lake came to live and grow up in the town, unknowingly the spawn of some fishlike creature who dwelt beneath the lake’s waters.
By 1491 DR, the northern wizard Telbor Zazrek was the High Lord. Telbor was a corrupt puppet of the Zhentarim who took hefty kickbacks in order to ensure Zhentarim trade goods were the only ones most folk could afford
1 – Inn
|
2 – Resident
|
3 – Gnoll
|
||
4 – Supplies
|
2 – Ghoul
|
3 – Zombie
|
||
4 – General Vaalgamon
|
2 – Rishpal
|