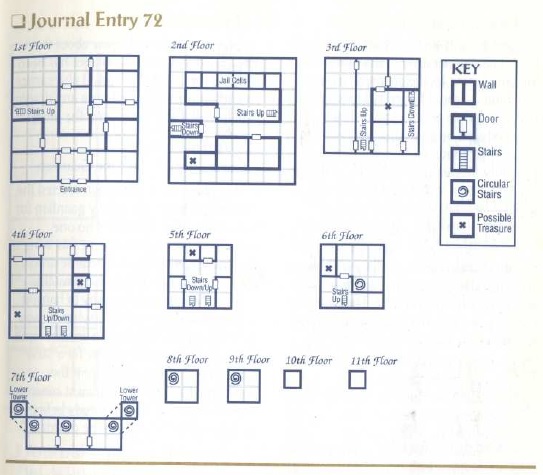
CATACOMBS
 1. Entrance/Exit. This leads to and from the Temple of Throtl.
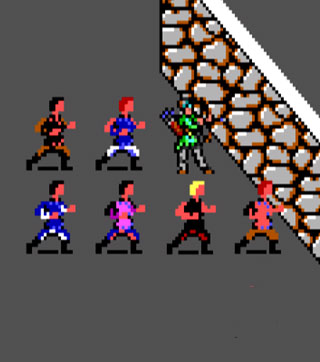
2. Ambush – Fighters attack you here in an ambush. You face several warriors and two black-robe mages. No matter what you do, the commander of the defending forces will send word to warn the rest of the Catacombs of your approach.
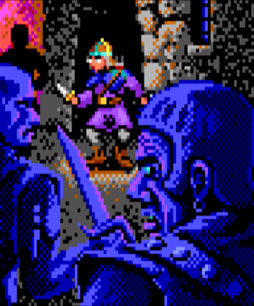
3. Information – A cleric is frantically trying to destroy some papers here. He is guarded by a number of undead servants. If you defeat him and his servants, you will gain more information on what is happening here.
4. Eggs (Quest) – You surprise seven baaz draconians trying to carry dragon eggs out of the room.
5. Gargath Map (Quest) – A group of monsters is surprised by the sudden appearance of your party. You face five warriors, two clerics, and a black robe mage arguing about the eggs. When they discover you, you may attack or flee. If you flee, however, they will be waiting for you the next time you enter the room. When you defeat them, you will gain a map to Dargath Keep.
This is another fight with several enemy spell casters. Use your ranged weapons and spells to knock out the black-robe mage quickly. If their mage Charms one of your party, use a Charm Person or Dispel Magic spell to bring him back, or just cast Hold Person on the charmed party member. Don’t be afraid to cast your spells, as you may rest for an unlimited amount of time in the next room at #6.
6. Rest (Service) – Here you discover a fabulous treasure containing 500 steel pieces, two gems, a +2 hoopak, a Potion of Invisibility, a Wand of Ice Storm, and a pair of Bracers AC6. The Wand of Ice Storm is the most important magic item you get here and should be used in several of the fights in the Catacombs, especially #20. Also, this room is secure so you can rest as much as necessary to get your spells back to maximum. Rest enough so that the moons cycle to your favor and then proceed with maximum bonus spells .
7. Encounter – Here you are attacked by several skeletons and giant rats.
8. Empty – This room is an old broom closet. There is nothing of value to be found here.
9. Hidden Treasure – If you search here you will find a suit of +1 Chain Mail.
10. Encounter – If you search here, you will be attacked by many skeletons and even more giant rats.
11. Ambush – There is an ambush here. You will enter and notice a whirling pattern of lights. If any of your characters make an intelligence roll, you will recognize the lights as an illusion designed to distract you while the enemy forces move in for the kill . This character will awaken the others (and gain 500 experience points for noticing the trap) and you will be able to fight without penalty. If you are mesmerized, however, you will have a severe penalty assessed against each character’s movement, THACO, and AC for the rest of the combat.
This is a very tough battle, even if you are warned. You will be up against five baaz draconians, four warriors, four hobgoblin leaders, and two black-robe mages. If you take out the black-robe mages before they can Charm one of your party members you’ll have no problem here. However, if you let them cast their spells, you’ll be in for a tough fight. Use your wand if you have to in order to win this one, because the treasure to be gained is tremendous.
If you are victorious, you will gain 1000 experience points per character, as well as a treasure of six gems, three jewelry, a Potion of Healing, and a Ring of Protection +1.
12. Dropping Eaves – You overhear a party of enemy troops complaining about having to move the eggs. They are also spreading the word that a group of good adventurers is on their trail.
13. Eggs (Quest) – You meet up with the party that you overheard at # 12 above. You will have to fight six warriors, four baaz draconians, acleric, and a black-robe mage. If any of them successfully run away from the battle (and they will try if you are winning), you will have to fight many more monsters before reaching the end of the catacombs.
Once again, don’t underestimate the danger that the spell casters pose. If they are allowed to cast their spells, you will probably lose the combat. Make sure you cast at least a couple of Sleep spells to reduce the number of active opponents.
14. Regroup – If anyone escaped from the battle at #13 above, you will have to fight four warriors, three baaz draconians, and two black-robe mages here. Again, take out the enemy spell casters as quickly as possible.
15. Regroup – If anyone escaped from the battle at #13 above, you will meet a large group of hobgoblins here.
16. Regroup – Another group of enemy forces is gathering here to stop you if anyone escaped from the battle at #13. If you attack immediately, you will gain the advantage of surprise. If you wait, they will be ready for you. The forces you will face include many hobgoblins led by four warriors and four baaz draconians.
17. Encounter – This room is filled with broken brass dragon eggshells. You spot some enemy troops carrying sacks of eggs. They are running out of the room and into the main caverns to the south.
18. Foreshadowing – You will hear footsteps to the west telling you where to go. You will also hear the sound of a dragon roaring, telling you to get ready for a serious fight ahead!
19. Encounter – Here you catch up to the fleeing enemy troops. While many will continue on with the sacks of eggs, some of them will remain behind to fight you. If you wait for them, they will advance up to 13 you and attack. The enemy company consists of many hobgoblin leaders, five warriors, and two blackrobe mages. Don’t let their spell casters get their Charm Person spells off, or you will be in serious trouble. Don’t advance towards the enemy, but form a battle line instead. If you wait for the enemy, you can defeat the enemy fighters before having to deal with the mages.
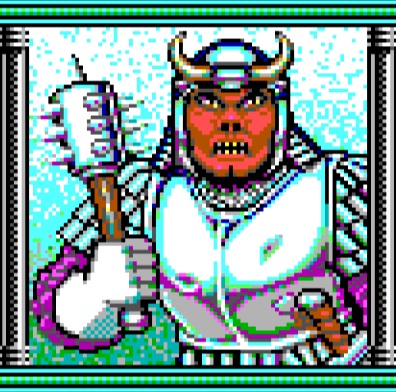
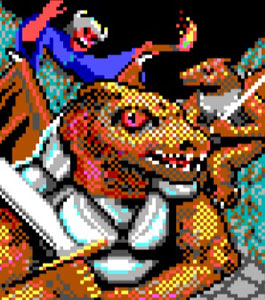
20. Dragons (Quest) – The gate to the Overland is here and is filled with hobgoblins trying to get out with the sacks of dragon eggs. When you arrive, you will be rushed by hobgoblins and a pair of white dragons. If you win the battle, each character will be rewarded with 4000 bonus experience points.
This is a very tough fight. You might want to have your clerics cast Resist Cold before entering this combat. Use every spell at your disposal and don’t be afraid to use the Wand of Ice Storm on the dragons. The dragons have a very good AC and are therefore difficult to hit. The wand will hit them no matter what and is very useful.
21. Skeleton – This is a room filled with piles of skeletons. There is nothing of value here.
22. Storage – There are old caskets and bones in here. You will find your searching to be fruitless.
 Synopsis: You have discovered that the enemy is still attempting to convert dragon eggs into draconians. You must now enter the Catacombs and scour it clean of enemy forces, and discover as much as you can about Myrtani’s sinister plan.
Goals: You must find out more about Myrtani’s plan and capture any caches of good dragon eggs that you can. Then you must return to the Outpost with the information and eggs so that the commander can decide what to do next.
Note: You will encounter white dragons at encounter #20. Be sure you go back to the Outpost to recuperate and train before trying to complete the Catacombs. You should use the Wand of Ice Storm gained in room #6 to defeat the many large encounters you will face in the Catacombs. Also, don’t forget that the Resist Cold spell will allow your party members to better stand up under the effects of the wand if you are caught in a confined space.
Be warned that there are many difficult random encounters in this area. You should save your game often and never
pass up an opportunity to rest and recuperate spells and hit points.
Where you can rest: You may rest in room #6 for an unlimited amount of time. Otherwise, you may rest anywhere but have a good chance of being detected and attacked if you rest for more than a short time. You can probably perform a FIX or memorize a few spells.
RANDOM ENCOUNTERS:
Your party will be beset by as many as eight random patrols here. These patrols contain the same monsters as those in the temple area above. You should be very careful to keep your spells memorized and your hit points at maximum. Use room #6 as a base for resting to regain spells and hit points.
If you return to the Temple of Throti, the patrols will reset and await your return.
 Objective: Find the dragon eggs and take out the dragons.
Starting location: The party goes directly from the Throtl Temple into the Catacombs. Make use of Room 6 where there is a generous treasure trove and safety for resting, healing and memoring spells. The Cluebook recommends returning to the Outpost to level up, but as long as you maintain Hold Person, Sleep and Dispel Magic spells from your last level up, you should be fine to stay here and finish the level.
Armor: You will find Bracers and a Ring of Protection +1. Equip these to help with defense.
Weapons: Make sure you have plenty of arrows before entering the catacombs, so you can stay in there and finish the level in one go.
Experience: You will get lots of experience in this level, especially from the final fight in area 20 with the dragons. Each member receives experience from winning the fight and a bonus of 4,000 experience. After completing the level, return to the Outpost to level up.
Quests: There are multiple areas where you will have the opportunity to retrieve eggs after combat and eggs dropped by fleeing enemies.
Leaving: Once you have the Catacombs, return to the Outpost to sell your treasure, have it identified, heal and level up. After Throtl, the temple and Catacombs, you will be very wealthy with lots of gems, jewerly, magic items and steel!
 The adventure begins after the good armies have recovered lands seized by the Dragon Armies in the War of the Lance and pushed the evil forces from the continent. After establishing outposts to watch over these territories, the good forces withdrew. Your party is
sent to man one of these outposts.
Supposedly the main evil forces have long fled and only the occasional wandering monster remains. On your first patrol, you find this just isn’t so. You find draconians ambushing agroup of the good settlers who have been moving into the reconquered lands. You defeat the baaz draconians. An aurak draconian, who could easily destroy you if he chose, seizes an ancient book. He takes this and Dimension Doors away, ignoring you as beneath his notice.
Returning to the outpost to report all of this, you find Sir Karl, aknight sent to investigate strange reports from the outposts, battling the outpost’s commandant. Sir Karl kills the commandant whose body changes into that of a sivak, a draconian warrior/assassin who assumes the shape of his victim.
From this and your report, Sir Karl quickly realizes that evil has been operating the outpost for its own ends, sending back false messages that all is well, while systematically wiping out the good forces sent to keep an eye on things. One of these forces is now in the (supposedly) abandoned hobgoblin city of Throtl, just northeast of the outpost. The force is led by Caramon Majere, one of the heroes of the War of the Lance. You are sent to warn him of the danger.


JOURNAL ENTRY 84
“.. .we have contacted the minotaurs. They will help us. I must go to Gargath. It is rumored that there is a dragonlance stored there. We must secure the keep and find the treasure room that is hidden there. The map of the keep shows those place where we believe the secret door may be located . Give this map to your officers and…”
The fragment ends
JOURNAL ENTRY 72